
Configure Linting, Formatting, and Autocompletion in Neovim
Configure Linting, Formatting, and Autocompletion in Neovim
Ready to customize how linting, formatting and autocompletion work in Neovim?
Let’s get started.

This story is a follow up from LSP Basics. If you haven’t read my article or want to know more about your LSP then check it out.
Preface
There are a host of features that you can enable once you setup your LSP in Neovim. Configuring a linter, formatter, and autocompletion are what I’d call the main features most users are looking for but you can configure almost anything you can imagine thanks to the extensibility of Neovim.
Configure Linter
A linter analyzes your source code and looks for ways you can improve it. Linters are more prevalent in dynamic languages than statically typed languages since those languages can rely more on their compiler and static types.
Up until recently many configurations used null-ls to configure their linter.
Null-ls was built to use Neovim as a language server to inject LSP diagnostics, code actions, and more via Lua.
This ended up being a LOT of configuration and as Neovim started to change more and more frequently it became too much for the author to maintain. He outlined his struggles with keeping up in this Github issue.
After the deprecation of null-ls, the community made a fork of null-ls called none-ls.
So what should we use?
You could continue to use null-ls until it breaks for you OR use the community maintained none-ls. But I personally recommend using nvim-lint.
GitHub - mfussenegger/nvim-lint: An asynchronous linter plugin for Neovim complementary to the…
An asynchronous linter plugin for Neovim complementary to the built-in Language Server Protocol support. - GitHub …github.com
First install using your favorite package manager (I recommend lazy.nvim). Here’s an example:
{ "mfussenegger/nvim-lint" }Here’s how to configure it (I configure it right with the install but you can break this out into it’s own file as well e.g. nvim-lint.lua):
{
    "mfussenegger/nvim-lint",
    event = {
      "BufReadPre",
      "BufNewFile",
    },
    config = function()
      local lint = require("lint")

      lint.linters_by_ft = {
        javascript = { "eslint_d" },
        typescript = { "eslint_d" },
        javascriptreact = { "eslint_d" },
        typescriptreact = { "eslint_d" },
        svelte = { "eslint_d" },
        kotlin = { "ktlint" },
        terraform = { "tflint" },
        ruby = { "standardrb" },
      }

      local lint_augroup = vim.api.nvim_create_augroup("lint", { clear = true })

      vim.api.nvim_create_autocmd({ "BufEnter", "BufWritePost", "InsertLeave" }, {
        group = lint_augroup,
        callback = function()
          lint.try_lint()
        end,
      })

      vim.keymap.set("n", "<leader>ll", function()
        lint.try_lint()
      end, { desc = "Trigger linting for current file" })
    end,
  }
event configures when nvim-lint will be loaded. I have set it to be loaded when the “BufReadPre” or “BufNewFile” events are fired, which is before a file is read OR when I create a new file.
config is our configuration block and the piece you could break out into a separate file. I require the plugin, then set which linters I want to use per filetype. Then I create an autocommand group and an autocommand to fire on the “BufEnter”, “BufWritePost”, “InsertLeave” events. Finally I setup a keymap so I can trigger linting manually using <leader>ll.
If you want to know more about autocommands, check out my article:
Create Autocommands in Neovim
Automate more of your workflow in Neovim with Autocommands!levelup.gitconnected.com
Now that you have configured your linter, make sure you have them installed.
If you went through the previous LSP article then you should have Mason installed. You can use Mason to install any linters or formatters you need and set them in your config to install automatically (under 2 or 3 in this screen).
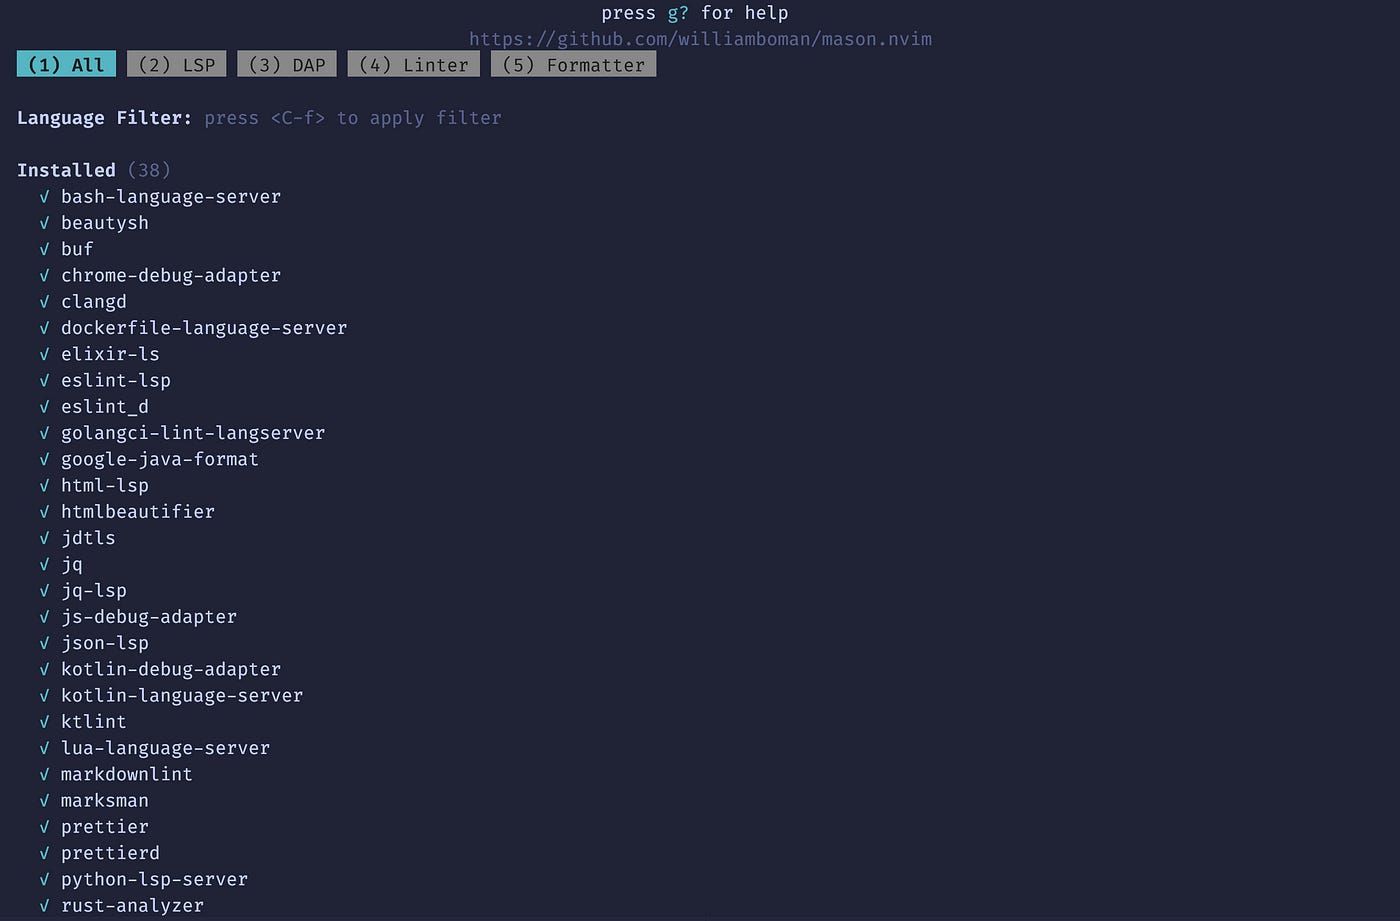
I use mason-tool-installer to auto install linters and formatters.
After configuring and restarting Neovim you should be able to manually lint your file using <leader>ll OR have it automatically do linting upon each of the events. If you want to see when those events happen, feel free to put a print(“trying to lint”) inside the autocommand function.
Configure Formatter
Now that we can see formatting errors in our code, let’s add a way to format our file to fix some of those errors automatically OR just make the code look much nicer with a single command vs manually updating line by line.
Like I mentioned above, null-ls used to be the all in one solution for linter and formatter configurations. Now that null-ls is deprecated, I recommend using conform.nvim.
GitHub - stevearc/conform.nvim: Lightweight yet powerful formatter plugin for Neovim
Lightweight yet powerful formatter plugin for Neovim - GitHub - stevearc/conform.nvim: Lightweight yet powerful…github.com
To install using lazy.nvim use this:
{
  'stevearc/conform.nvim',
  opts = {},
}
Next, we need to configure some formatters by filetype. I have all mine configured in my lazy.lua file:
{
    "stevearc/conform.nvim",
    event = { "BufReadPre", "BufNewFile" },
    config = function()
      require("conform").setup({
        formatters_by_ft = {
          lua = { "stylua" },
          svelte = { { "prettierd", "prettier" } },
          javascript = { { "prettierd", "prettier" } },
          typescript = { { "prettierd", "prettier" } },
          javascriptreact = { { "prettierd", "prettier" } },
          typescriptreact = { { "prettierd", "prettier" } },
          json = { { "prettierd", "prettier" } },
          graphql = { { "prettierd", "prettier" } },
          java = { "google-java-format" },
          kotlin = { "ktlint" },
          ruby = { "standardrb" },
          markdown = { { "prettierd", "prettier" } },
          erb = { "htmlbeautifier" },
          html = { "htmlbeautifier" },
          bash = { "beautysh" },
          proto = { "buf" },
          rust = { "rustfmt" },
          yaml = { "yamlfix" },
          toml = { "taplo" },
          css = { { "prettierd", "prettier" } },
          scss = { { "prettierd", "prettier" } },
        },
      })

      vim.keymap.set({ "n", "v" }, "<leader>l", function()
        conform.format({
          lsp_fallback = true,
          async = false,
          timeout_ms = 500,
        })
      end, { desc = "Format file or range (in visual mode)" })
    end,
  }
event configures when conform.nvim will be loaded. I have set it to be loaded when the “BufReadPre” or “BufNewFile” events are fired, which is before a file is read OR when I create a new file.
config is our configuration block and the piece you could break out into a separate file (e.g. conform.lua). I require the plugin, then set which formatters I want to use per filetype. Then I setup a keymap so I can trigger formatting manually using <leader>l. Notice that I am using conform instead of the Neovim built in LSP API.
If you wanted to setup an autocommand to automatically format code for you then you can add something like this:
vim.api.nvim_create_autocmd("BufWritePre", {
  callback = function(args)
    require("conform").format({ bufnr = args.buf })
  end,
})
OR if you wanted to use set this up to with conform then you can add this to your config instead of creating an autocommand separately:
  format_on_save = {
    -- These options will be passed to conform.format()
    timeout_ms = 500,
    lsp_fallback = true,
  },
Don’t forget to install any formatters you need.
After restarting Neovim, you should be able to open a file, mess up the format, and then hit <leader>l to fix the formatting!
Configure Autocompletion
Last but not least, let’s setup autocompletion. Neovim has some built in autocompletion but we want to extend it with information from our LSP config and also add snippets.
From the previous article, you should have some config already for nvim-lspconfig, which has configuration for many Language Servers:
  {
    "neovim/nvim-lspconfig",
    config = function()
       require'lspconfig'.pyright.setup{}
       require'lspconfig'.tsserver.setup{}
    end,
  }
We will need to add a new plugin nvim-cmp to give us a completion engine to utilize the Language Servers to autocomplete our code.
We will configure nvim-cmp to be our hub for autocompletion and then add sources for different inputs to autocomplete our code.
Here is an example of installing and configuring using lazy.nvim inside of a new file nvim-cmp.lua:
{
  "hrsh7th/nvim-cmp",
  event = "InsertEnter",
  dependencies = {
    "hrsh7th/cmp-buffer", -- source for text in buffer
    "hrsh7th/cmp-path", -- source for file system paths in commands
    "L3MON4D3/LuaSnip", -- snippet engine
    "saadparwaiz1/cmp_luasnip", -- for lua autocompletion
    "rafamadriz/friendly-snippets", -- useful snippets library
    "onsails/lspkind.nvim", -- vs-code like pictograms
  },
  config = function()
    local cmp = require("cmp")

    local luasnip = require("luasnip")

    local lspkind = require("lspkind")

    -- loads vscode style snippets from installed plugins (e.g. friendly-snippets)
    require("luasnip.loaders.from_vscode").lazy_load()

    cmp.setup({
      completion = {
        completeopt = "menu,menuone,preview,noselect",
      },
      snippet = { -- configure how nvim-cmp interacts with snippet engine
        expand = function(args)
          luasnip.lsp_expand(args.body)
        end,
      },
      mapping = cmp.mapping.preset.insert({
        ["<C-n>"] = cmp.mapping.select_prev_item(), -- previous suggestion
        ["<C-p>"] = cmp.mapping.select_next_item(), -- next suggestion
        ["<C-u>"] = cmp.mapping.scroll_docs(-4),
        ["<C-d>"] = cmp.mapping.scroll_docs(4),
        ["<C-Space>"] = cmp.mapping.complete(), -- show completion suggestions
        ["<C-e>"] = cmp.mapping.abort(), -- close completion window
        ["<CR>"] = cmp.mapping.confirm({ select = false }),
      }),
      -- sources for autocompletion
      sources = cmp.config.sources({
        { name = "nvim_lsp" },
        { name = "luasnip" }, -- snippets
        { name = "buffer" }, -- text within current buffer
        { name = "path" }, -- file system paths
      }),
      -- configure lspkind for vs-code like pictograms in completion menu
      formatting = {
        format = lspkind.cmp_format({
          maxwidth = 50,
          ellipsis_char = "...",
        }),
      },
    })
  end,
}
We add several dependencies so that they will be installed and can be used as our sources.
"hrsh7th/cmp-buffer", -- source for text in buffer
"hrsh7th/cmp-path", -- source for file system paths in commands
"L3MON4D3/LuaSnip", -- snippet engine
"saadparwaiz1/cmp_luasnip", -- for lua autocompletion
"rafamadriz/friendly-snippets", -- useful snippet library
"onsails/lspkind.nvim", -- vs-code like pictograms
What are snippets?
Snippets are templates that you can quickly expand to reduce the amount of typing you need to do.
A common example is a function definition. Here’s an example of a snippet in Typescript:
const X = (X: X): X => {
  X
}
Each “X” is something you can Tab to fill in. This allows you to avoid typing some characters and quickly “Tabbing” to each place to fill in the correct details.
LuaSnip is a snippet engine to allow us to Tab or use some other keymappings to jump to each location and expand our snippets.
friendly-snippets is a list of snippets for different languages. There are several other libraries of snippets you can pull in and these are typically in the VSCode format so they can be used across Neovim and VSCode.
If you want to define your own snippets or understand more about them then check out these videos:
Within cmp.setup we configure how completion works, luasnip, some mappings for our autocomplete menu, our sources, and add some pictograms to show in our menu (mimicking VSCode).
Define keymaps for Nvim-cmp
You will need to specify the keymaps that you prefer to scroll up and down the docs, confirm your selection, and go up and down the list of options.
Feel free to update the keymaps however you like but be sure to double check you don’t have any conflicts using :checkhealth or searching in :Telescope keymaps.
Order Sources
Last but not least you need to order your sources in your preferred way so that items to autocomplete show up in the order you prefer.
The order I have defined above specifies LSP options first, then snippets, then buffer matches, and last path matches.
Wrapping up
After installing and configuring nvim-cmp you should see snippets, buffer options, and options from your LSP after typing a few characters in insert mode.

Success!
Configuration for LSP Zero Users
If you are using LSP Zero like me then here is an example config:
Installation using lazy.nvim
{
    "VonHeikemen/lsp-zero.nvim",
    branch = "v2.x",
    dependencies = {
      -- LSP Support
      { "neovim/nvim-lspconfig" }, -- Required
      {                            -- Optional
        "williamboman/mason.nvim",
        build = function()
          pcall(vim.cmd, "MasonUpdate")
        end,
      },
      { "williamboman/mason-lspconfig.nvim" }, -- Optional

      -- Autocompletion
      { "hrsh7th/nvim-cmp" },     -- Required
      { "hrsh7th/cmp-nvim-lsp" }, -- Required
      { "L3MON4D3/LuaSnip" },     -- Required
      { "rafamadriz/friendly-snippets" },
      { "hrsh7th/cmp-buffer" },
      { "hrsh7th/cmp-path" },
      { "hrsh7th/cmp-cmdline" },
      { "saadparwaiz1/cmp_luasnip" },
    },
  }
Configuration in lsp.lua:
local lsp = require('lsp-zero')

lsp.preset("recommended")

lsp.ensure_installed({
    'tsserver',
    'eslint',
    'rust_analyzer',
    'kotlin_language_server',
    'jdtls',
    'lua_ls',
    'jsonls',
    'html',
    'elixirls',
    'tailwindcss',
    'tflint',
    'pylsp',
    'dockerls',
    'bashls',
    'marksman',
    'solargraph',
})

local cmp = require("cmp")
local cmp_select = { behavior = cmp.SelectBehavior.Select }
local cmp_mappings = lsp.defaults.cmp_mappings({
    ["<C-p>"] = cmp.mapping.select_prev_item(cmp_select),
    ["<C-n>"] = cmp.mapping.select_next_item(cmp_select),
    ["<C-y>"] = cmp.mapping.confirm({ select = true }),
    ["<CR>"] = cmp.mapping.confirm({ select = true }),
    ['<C-Space>'] = cmp.mapping.complete(),
})

lsp.setup_nvim_cmp({
    mapping = cmp_mappings
})

lsp.on_attach(function(client, bufnr)
    local opts = { buffer = bufnr, remap = false }

    vim.keymap.set("n", "gr", function() vim.lsp.buf.references() end, opts, { desc = "LSP Goto Reference"})
    vim.keymap.set("n", "gd", function() vim.lsp.buf.definition() end, opts, { desc = "LSP Goto Definition"})
    vim.keymap.set("n", "K", function() vim.lsp.buf.hover() end, opts, { desc = "LSP Hover"})
    vim.keymap.set("n", "<leader>vws", function() vim.lsp.buf.workspace_symbol() end, opts, { desc = "LSP Workspace Symbol"})
    vim.keymap.set("n", "<leader>vd", function() vim.diagnostic.setloclist() end, opts, { desc = "LSP Show Diagnostics"})
    vim.keymap.set("n", "[d", function() vim.diagnostic.goto_next() end, opts, { desc = "Next Diagnostic"})
    vim.keymap.set("n", "]d", function() vim.diagnostic.goto_prev() end, opts, { desc = "Previous Diagnostic"})
    vim.keymap.set("n", "<leader>vca", function() vim.lsp.buf.code_action() end, opts, { desc = "LSP Code Action"})
    vim.keymap.set("n", "<leader>vrr", function() vim.lsp.buf.references() end, opts, { desc = "LSP References"})
    vim.keymap.set("n", "<leader>vrn", function() vim.lsp.buf.rename() end, opts, { desc = "LSP Rename"})
    vim.keymap.set("i", "<C-h>", function() vim.lsp.buf.signature_help() end, opts, { desc = "LSP Signature Help"})
end)

require('lspconfig').lua_ls.setup(lsp.nvim_lua_ls())

lsp.setup()

local cmp_action = require('lsp-zero').cmp_action()

require('luasnip.loaders.from_vscode').lazy_load()

-- `/` cmdline setup.
cmp.setup.cmdline('/', {
    mapping = cmp.mapping.preset.cmdline(),
    sources = {
        { name = 'buffer' }
    }
})

-- `:` cmdline setup.
cmp.setup.cmdline(':', {
    mapping = cmp.mapping.preset.cmdline(),
    sources = cmp.config.sources({
        { name = 'path' }
    }, {
        {
            name = 'cmdline',
            option = {
                ignore_cmds = { 'Man', '!' }
            }
        }
    })
})

cmp.setup({
    sources = {
        { name = 'nvim_lsp' },
        { name = 'luasnip', keyword_length = 2 },
        { name = 'buffer',  keyword_length = 3 },
        { name = 'path' },
    },
    mapping = {
        ['<C-f>'] = cmp_action.luasnip_jump_forward(),
        ['<C-b>'] = cmp_action.luasnip_jump_backward(),
        ['<Tab>'] = cmp_action.luasnip_supertab(),
        ['<S-Tab>'] = cmp_action.luasnip_shift_supertab(),
    },
})
Conclusion
I hope this has helped your understanding of Linters, Formatters, and Autocompletion in Neovim. There are many more ways to utilize the LSP to get more custom behavior for however you want to work in Neovim. Let me know if you have any plugins or configuration that you have found especially useful.
Here are a few other Neovim articles you should check out:


If you enjoy topics like this then you might also like my Youtube channel. Have a great day!